Create Your First Extension
Extensions are the core of your phone system --- they represent users or devices that can make and receive calls through FS PBX.
This guide walks you through setting up your first working extension so you can log in from a softphone or physical IP phone.
🧩 Step 1 -- Log In to FS PBX
Log in to your FS PBX web dashboard using your admin account.
If you've just installed FS PBX, use the credentials that were generated during installation.
Once you’re logged in, select an existing Domain (tenant) from the Domain selector, or create a new Domain where the extension will be created.
🧭 Step 2 -- Navigate to Extensions
Click on the Extensions tile.
This page lists all existing extensions on your domain.
Click the "Create" button in the top right corner to create a new one.
📋 Step 3 -- Basic Extension Information
Fill out the basic details:
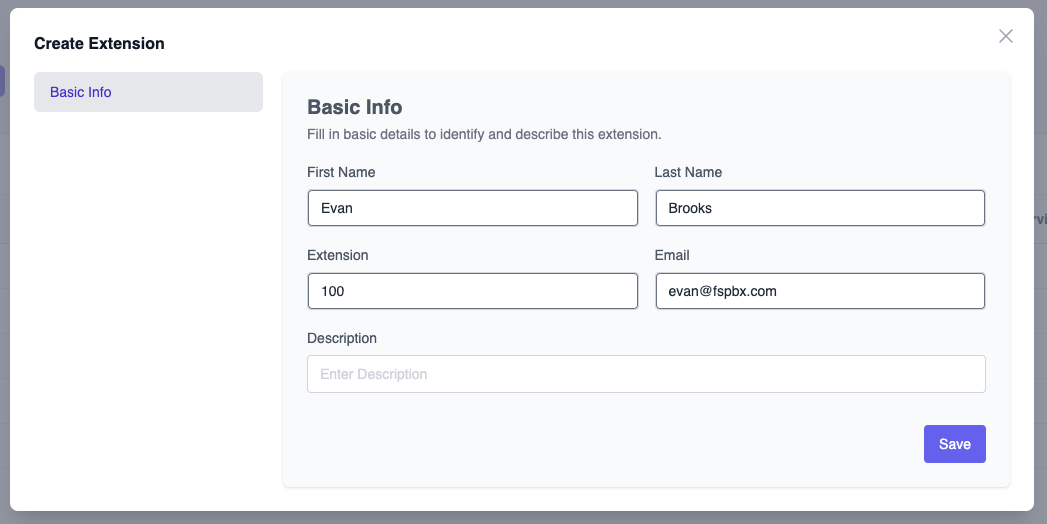
Click Save when done.
📱 Step 4 -- Connect Your Device or Softphone
You can now connect to the PBX using any SIP-compatible device or softphone, such as Zoiper, Groundwire, or Bria.
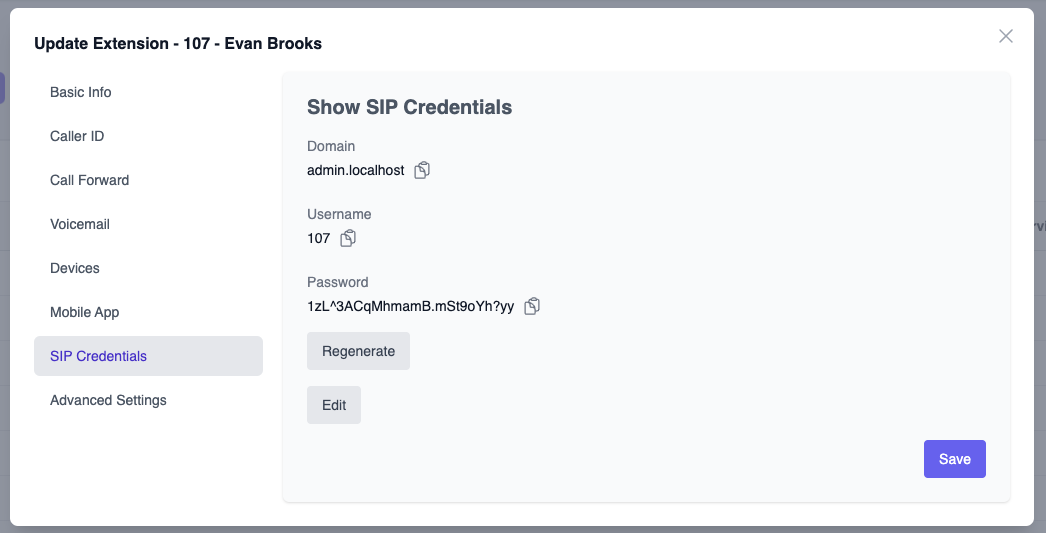
Open your extension in FS PBX and navigate to the SIP Credentials tab.
Here you'll find the information needed to register your device:
-
Domain -- Your FS PBX domain name (for example,
admin.localhost) -
Username -- Typically your extension number (e.g.
100) -
SIP Password -- Auto-generated password used for registration
Enter these values into your softphone or desk phone's SIP account settings.
Once connected, the extension should show as Registered in FS PBX.
☑️ Step 5 -- Test Your Setup
Once your device registers successfully, you should see the green "Registered" status under the extension list.
To test:
-
Create a second extension (e.g.
101) -
Register it on another softphone
-
Try calling between them --- both should ring and connect instantly
If the call connects, congratulations 🎉 --- your first extension is ready to use!