ClickSend SMS Provider Configuration
FS PBX supports two-way SMS messaging via ClickSend. This guide explains how to:
-
Add ClickSend credentials to your
.env -
Retrieve the Subaccount ID used to authenticate inbound messages
-
Enable ClickSend on phone numbers in Message Settings
1. Required Environment Variables
Add the following variables to your .env file:
CLICKSEND_USERNAME=
CLICKSEND_SUBACCOUNT_ID=
CLICKSEND_API_KEY=
CLICKSEND_BASE_URL=https://rest.clicksend.com
What Each Value Does
| Variable | Purpose |
|---|---|
| CLICKSEND_USERNAME | API username used for outbound API calls to ClickSend. |
| CLICKSEND_SUBACCOUNT_ID | The ID of a ClickSend subaccount used by FS PBX to validate inbound webhook requests (not used for outbound). |
| CLICKSEND_API_KEY | API key paired with CLICKSEND_USERNAME for outbound authentication. |
| CLICKSEND_BASE_URL | Base URL for ClickSend's REST API. Default: https://rest.clicksend.com. |
Important:
Outbound SMS authentication usesCLICKSEND_USERNAME+CLICKSEND_API_KEY.
TheCLICKSEND_SUBACCOUNT_IDis only used when FS PBX verifies inbound webhook payloads from ClickSend.
2. Getting Your ClickSend API Username & API Key
-
Log in to your ClickSend dashboard.
-
From the left-hand menu, go to:
Developers → API Credentials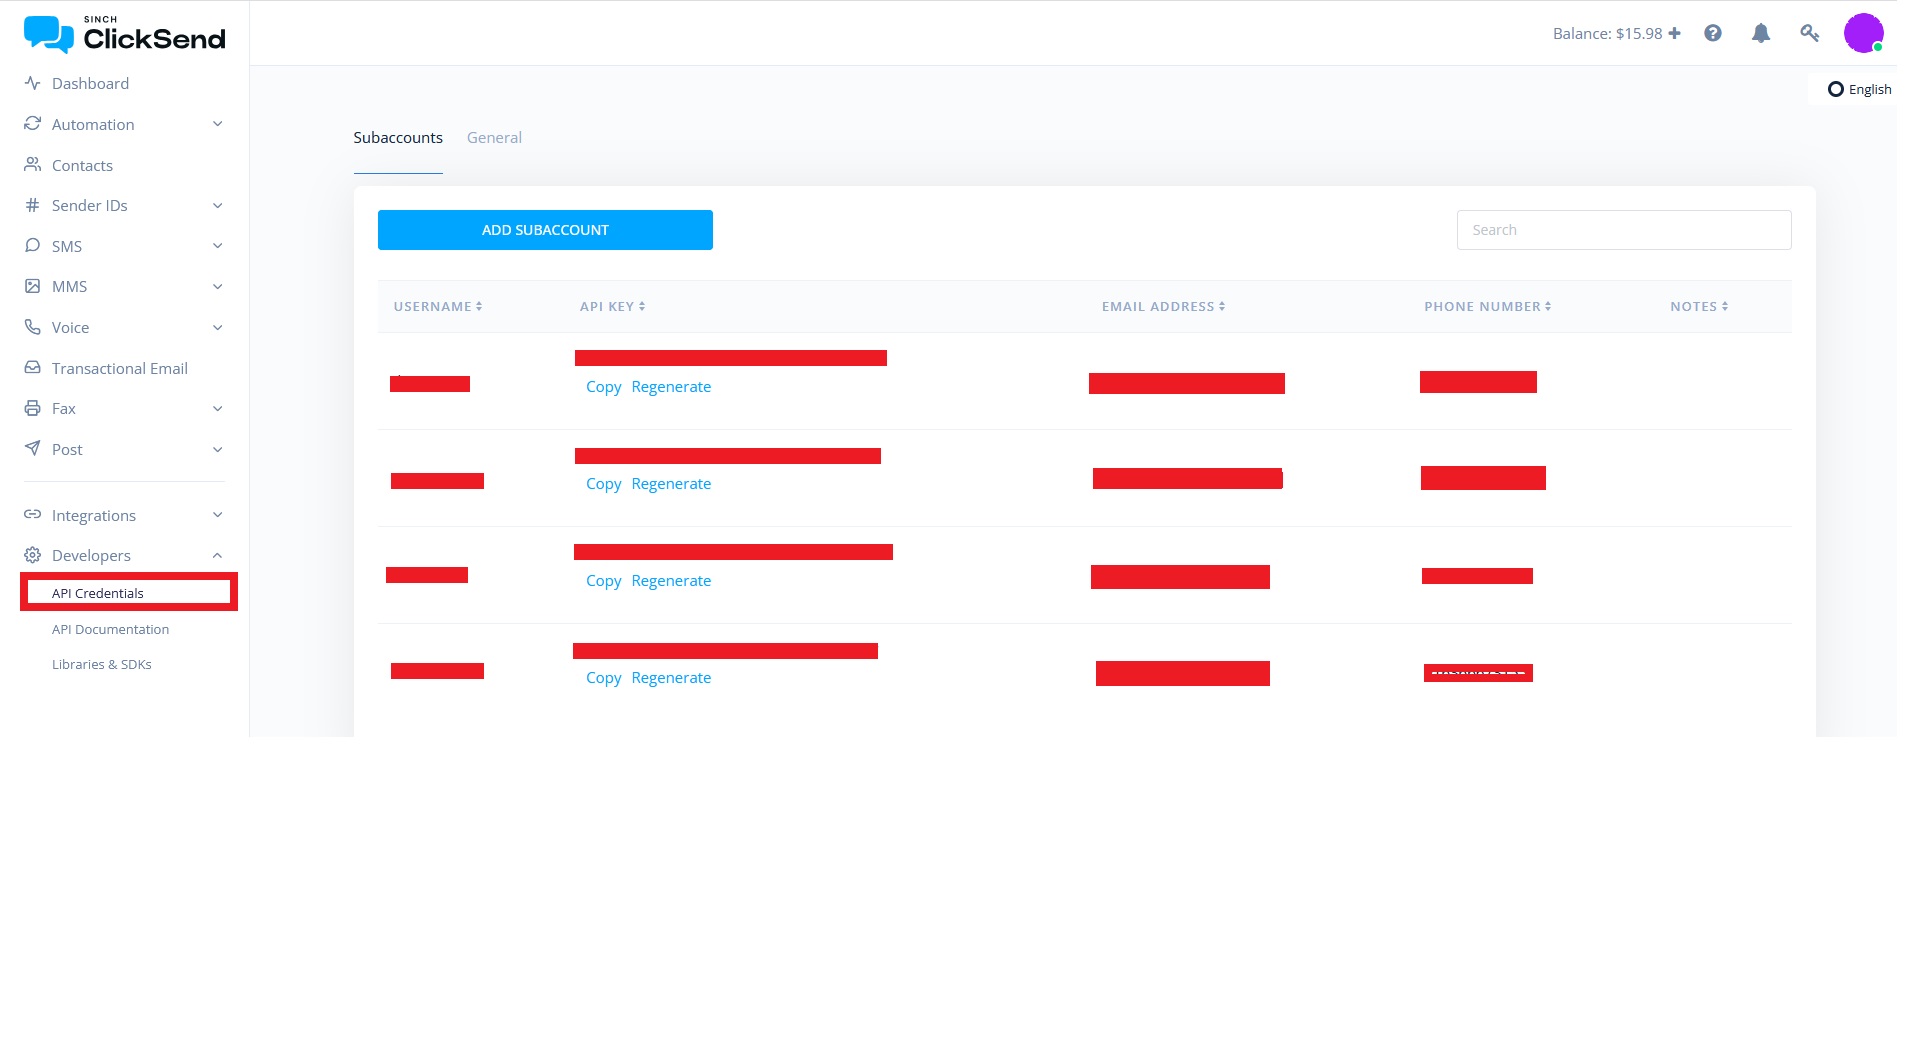
-
Here you can:
- See or regenerate your API Username and API Key
Copy:
-
The API Username →
CLICKSEND_USERNAME -
The API Key →
CLICKSEND_API_KEY
These will be used for outbound SMS requests from FS PBX.
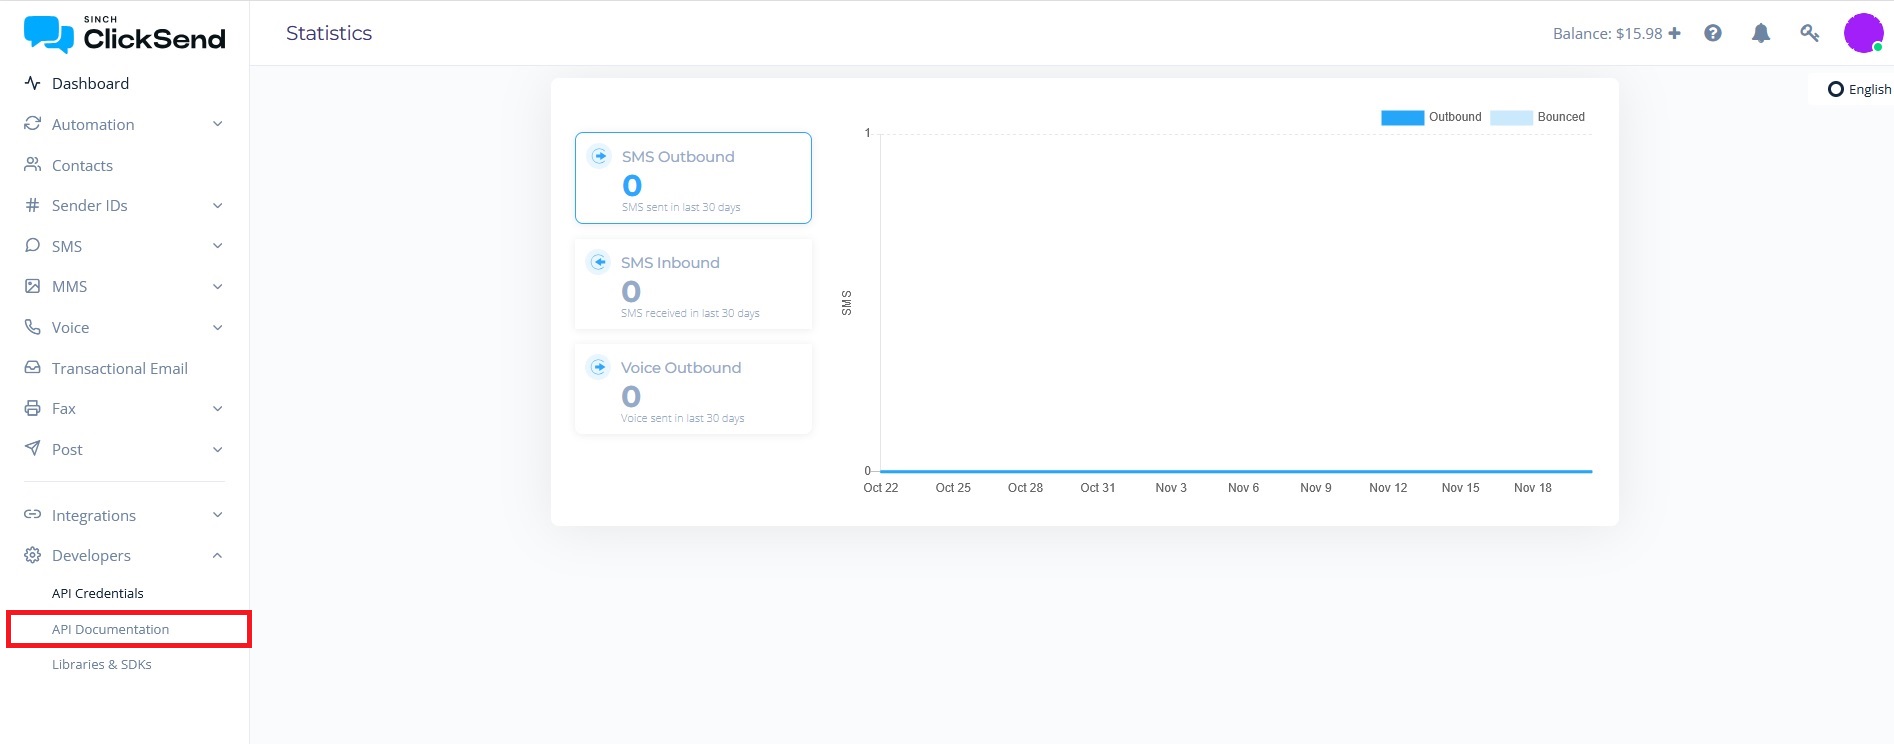
3. Finding the subaccount_id (for inbound auth)
FS PBX uses the ClickSend Subaccount ID to authenticate inbound messages received via webhook. This helps ensure that only messages from the expected ClickSend subaccount are processed.
Step 1 -- Open API Documentation
- In the left menu, go to:
Developers → API Documentation
This opens ClickSend's interactive API docs.
Step 2 -- Use the "View Subaccounts" Endpoint
-
In the API docs, navigate to:
Account → Subaccounts → View Subaccounts (GET /v3/subaccounts) -
Use Basic Auth with:
-
Username = your ClickSend API username
-
Password = your ClickSend API key
-
-
Click Send.
You'll see a JSON response listing subaccounts, e.g.:
{ "subaccount_id": 123456, "api_username": "your_subaccount_username", "api_key": "xxxxxxxx", ... }

- Choose the subaccount you want to use for inbound SMS and copy its
subaccount_id, then set:
CLICKSEND_SUBACCOUNT_ID=123456
FS PBX will compare this ID against incoming webhook data to ensure inbound messages are coming from the correct ClickSend subaccount. It does not affect outbound authentication.
4. Apply Configuration Changes
After updating .env, reload Laravel's configuration cache:
php artisan config:cache
If you skip this, FS PBX will continue using old values and ClickSend may not work correctly.
5. (Optional but Recommended) Webhook Setup for Inbound SMS
To enable inbound SMS via ClickSend, configure a webhook to send messages to FS PBX.
In ClickSend:
-
Go to SMS → inbound configuration (or equivalent section).
-
Set the Inbound SMS Webhook URL to:
https://your-domain/webhook/clicksend/sms
When ClickSend posts an inbound message:
-
FS PBX receives the payload at
/webhook/clicksend/sms -
FS PBX checks the subaccount information in the payload against
CLICKSEND_SUBACCOUNT_ID -
If it matches, the message is accepted and routed to the correct extension
6. Enable ClickSend on a Phone Number in FS PBX
Once credentials and (optionally) webhooks are configured:
-
Go to Advanced → Message Settings in FS PBX.
-
Add or edit a phone number.
-
Select ClickSend as the SMS provider.
-
Assign:
-
An extension → inbound SMS will appear in the FS PBX mobile app for that user.
-
Optionally an email address → for read-only email notifications.
-
Then:
-
Inbound SMS → ClickSend → FS PBX → Extension's Mobile App
-
Replies from the app → FS PBX (using
CLICKSEND_USERNAME+CLICKSEND_API_KEY) → ClickSend → Original sender
Summary
To integrate ClickSend with FS PBX:
-
Set
CLICKSEND_USERNAME,CLICKSEND_API_KEY,CLICKSEND_SUBACCOUNT_ID, andCLICKSEND_BASE_URLin.env. -
Remember:
-
Outbound =
CLICKSEND_USERNAME+CLICKSEND_API_KEY -
Inbound auth =
CLICKSEND_SUBACCOUNT_ID
-
-
Run
php artisan config:cache. -
(Optional) Configure inbound SMS webhooks to
/webhook/clicksend/sms. -
Assign ClickSend as the provider for numbers in Message Settings.
If you want, next we can put together a short "SMS Providers Index" page that links to all five provider articles with a one-line summary for each.